Naming your Webflow forms makes it easier to track information. In this tutorial, learn how to change the name of a form.
Giving custom names to your different forms on your webflow site has many advantages! Like for example :
- To be able to know from which page the user has contacted you.
- Trigger actions (marketing automations) with zapier in case a certain form is filled in.
- Keeping your webflowsite well organised.
The step-by-step tutorial
1 - Select the form
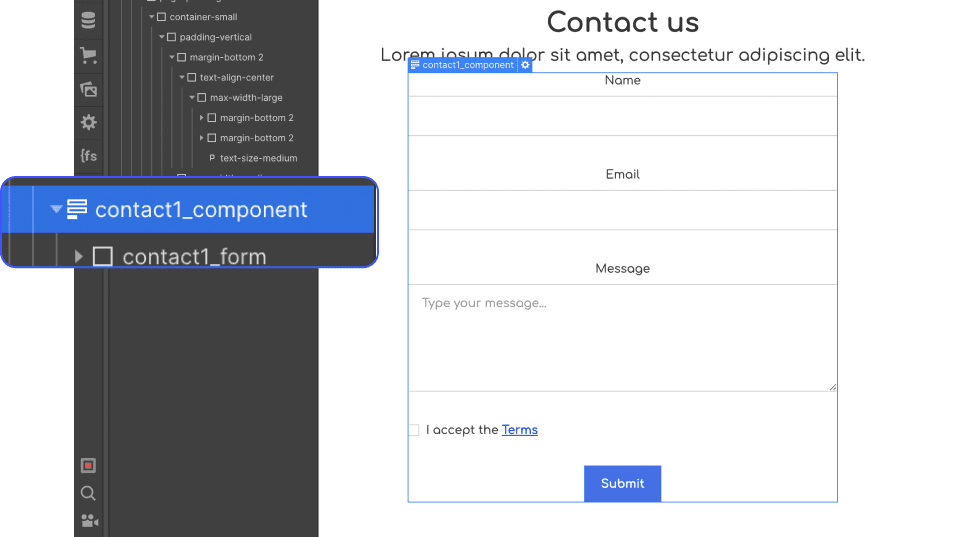
Click on the form element (recognisable by its icon in the Navigator) to select the form.
2 - Open the settings
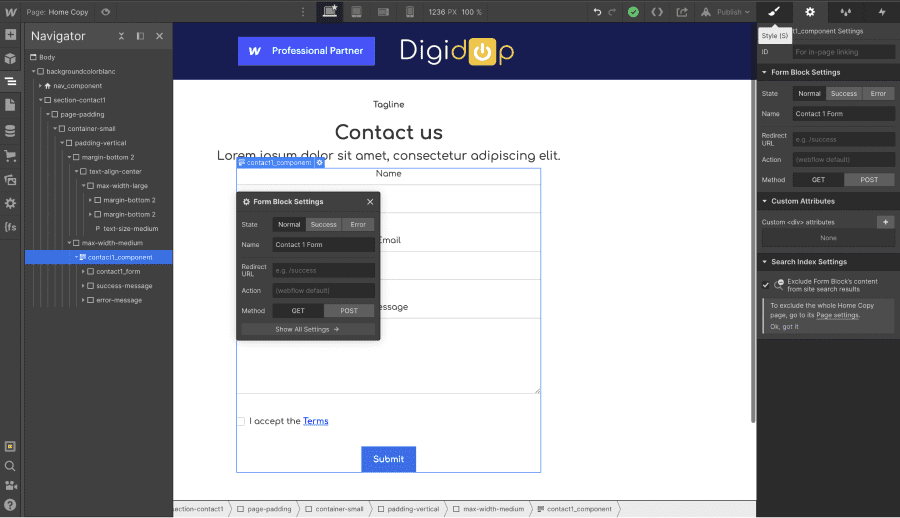
Once you have selected the parent element of the form, you can open the settings in 3 different ways:
- By pressing the enter key
- By clicking on the small icon ⚙️
- By pressing the D key (keyboard shortcut)
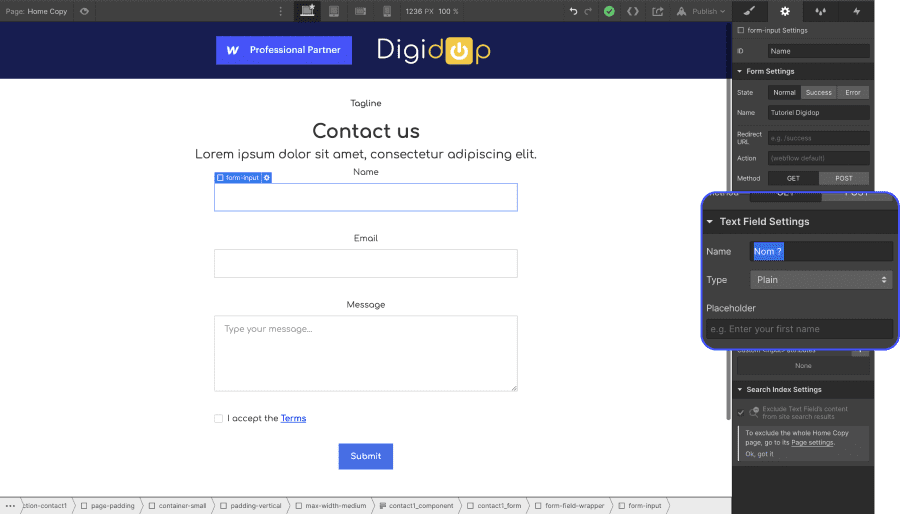
⚠️ To change the name of a particular field: name, email, phone, etc. Double-click on any item in the form block to open the settings panel for that field. You can also access the settings by selecting an item and pressing the Enter key.
3 - Change the name of your form
In the form blocks settings → Name field → Write the name of your form here
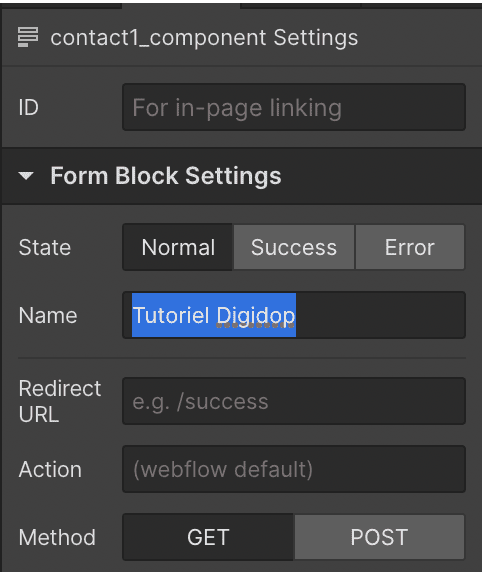
⚠️ Not to be confused with the ID. The ID is used to give the element a name, to create links on your site.
4 - Checking the customisation
To check that the change of name of the form has been carried out correctly, I advise you to do this small test.
- Publish your site
- Complete and submit the form
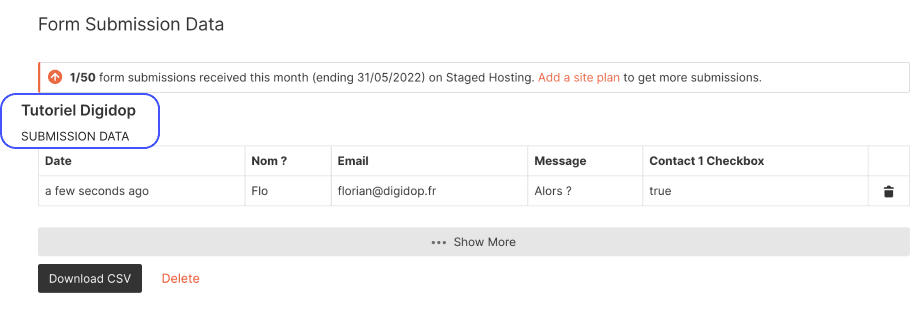
- Go to the project settings of your Webflow project → "Forms" tab
- Section : Form Submission Data
- Check that the name of the form is personalized ✅
Conclusion
And now you know how to change the name of a webflow site form. This customization is very useful to keep a webflow site well organized.
Bonus organisation: you can give the same name to several identical forms. Very useful if you want to create an automation for sending a white paper from a pop-up on your website, for example.


.jpg)


