Connect your Webflow site to Hubspot with Zapier! A tutorial to automate your marketing and sales strategies in 5 steps.
There are several methods to connect your Webflow site with your Hubspot marketing tool. In this article we use thenocode automation tool Zapier to connect these two tools. Using Zapier, you can perform many actions to develop a powerful marketing strategy.
Zapier's Hubspot module allows you to perform dozens of actions to automate your CRM and campaigns:
- Create or update a contact
- Create a company account
- Create a new deal
- Managing engagement
- See new tickets / products / contacts / companies / etc.
- Add a contact to a list
- Create a task in a calendar
- Add a contact to a workflow
- etc.
A very powerful combo of tools! Here's how to connect them.
Step 1. Connect your Webflow account to Zapier
To create a workflow on Zapier, you first need toadd a trigger, which will start the automation:
- instantly following an event
- deferred following an event
- at a regular time interval
We will choose here a Webflow module as a trigger. So start by connecting your Webflow site to Zapier.
- From the Zapier interface click on "Create Zap".
- From the "Trigger" search bar, look for the Webflow module
- Choose the trigger you wish to use, e.g. "Form Submisision".
- Login to your Webflowaccount
- Choose your Webflowproject
- Test your trigger and continue
Step 2. Connect your Hubspot account to Zapier
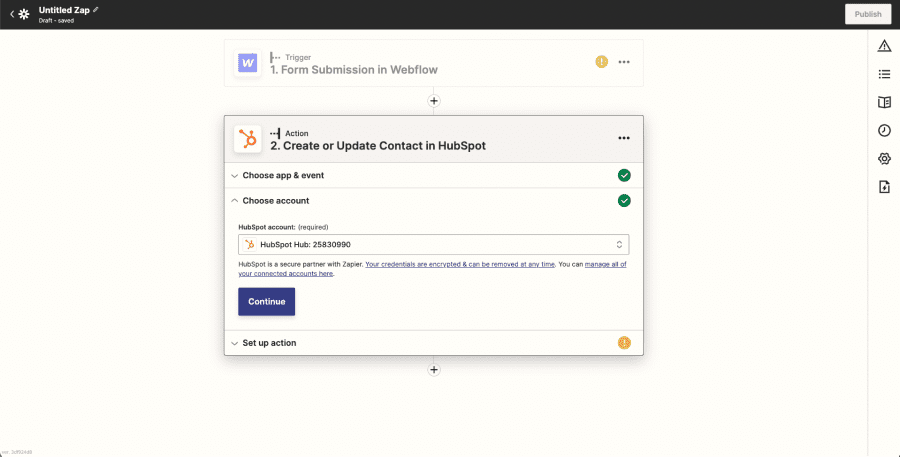
In this second step we want to add an action that will be triggered after the Webflow module (Step 1).
- Search for the Hubspotmodule
- Choose the event you wish to use, e.g. "Create or Update Contact".
- Connect your Hubspot account by clicking on "Sign in". A pop-up window will open, you will be asked to enter your Hubspot credentials , choose the account you wish to link and accept that Zapier can access your account.
- Click on "Continue" to proceed to the setup step

Step 3. Set up your Hubspot account in Zapier
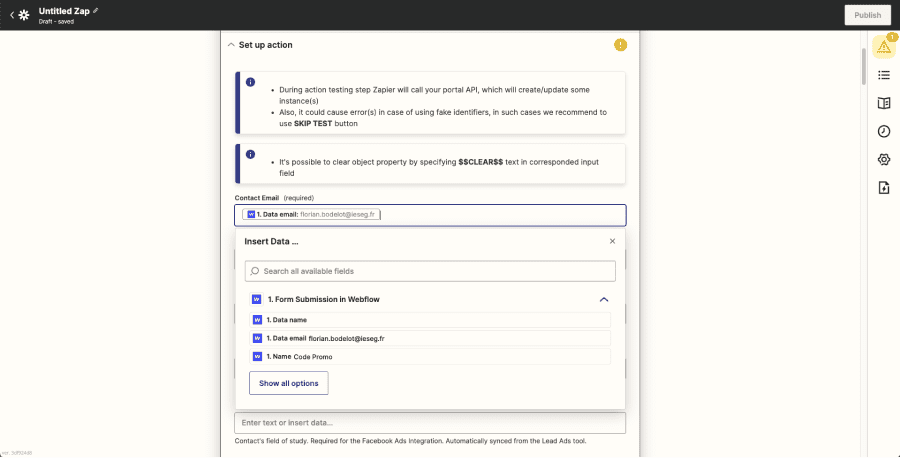
You can now access all the Hubspot fields, which you will be able to set up and feed with the data from the Webflow module. Required fields are identified by a "Required" mention. Only the email field is mandatory to create or update a contact in Hubspot.
- Insert Webflow data in Hubspot fields: click on the field, add the associated Webflow data.
- Customise Hubspot fields: you can write directly into the fields by combining data from previous modules.
- Set up select fields: you will be able to choose default options on your drop-down lists.
- Click on Continue

Step 4. Test the automation
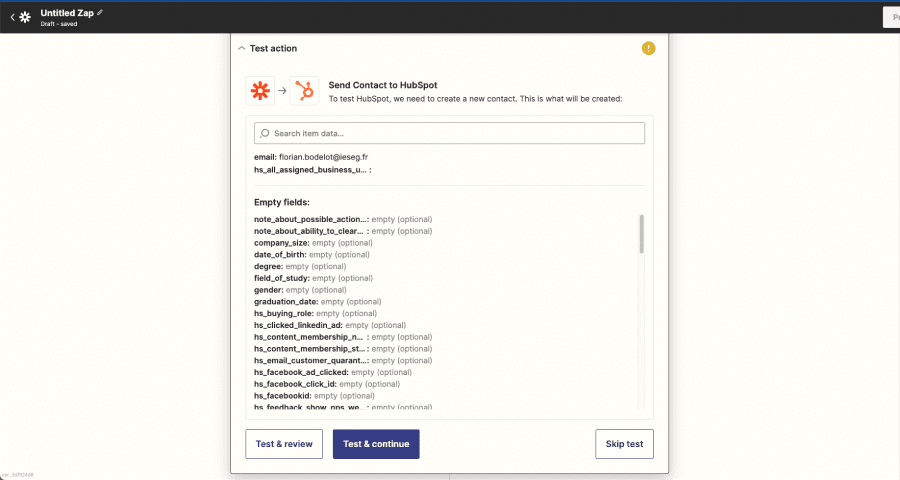
Once the Webflow and Hubspot modules have been set up, you can test your automation to ensure that all the data is going back into Hubspot correctly. Click on Test & Continue.

Step 5. Activate the automation
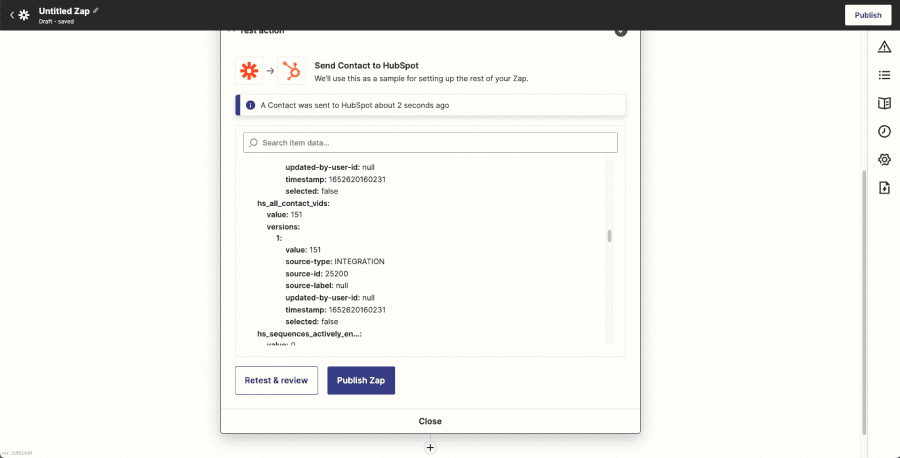
If the tests work, you can activate your automation by clicking on "Publish Zap".
You also have the possibility to retest your automation by feeding back more data. Click on "Retest & Review".


.jpg)


