Step-by-step tutorial to connect your webflow site to a custom domain (Tutorial in French)
Discover in this tutorial the steps to follow to publish your website Webflow on a custom domain name.
By publishing your website on a custom domain, you can start getting your first SEO results!
The step-by-step guide
Step 1: Buy a custom domain name
There are different domain name providers. Discover in this video tutorial how to buy and manage a domain name on the Google Domains platform:
You must have a domain name to be able to connect your Webflow site to it.
Step 2: Sign up for a paid plan
Webflow offers for free the possibility to publish your site on a "webflow.io" version. If you want to publish your site on a custom domain such as "digidop.fr" you have to pay a fee.
So add a paid plan (Basic, CMS, Pro, Advanced, etc.) to your Webflow project.
Step 3: Add the custom domain to your Webflow project
- Open the "projects settings" of the project in question
- Go to the "Hosting" tab
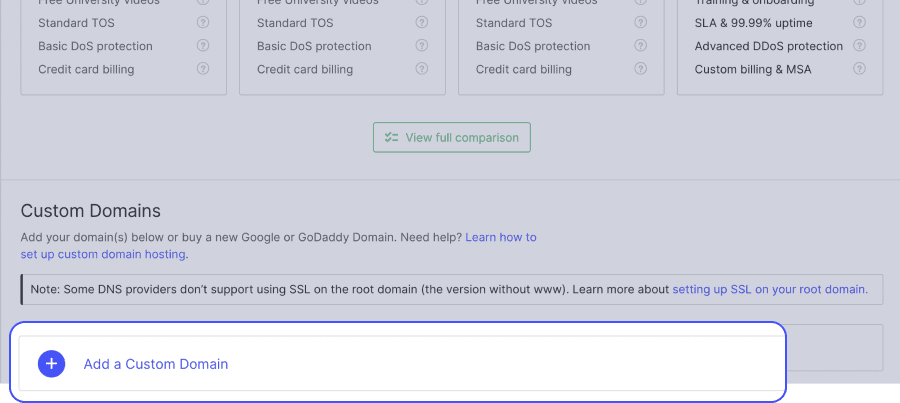
- Scroll down to the "custom domain" section
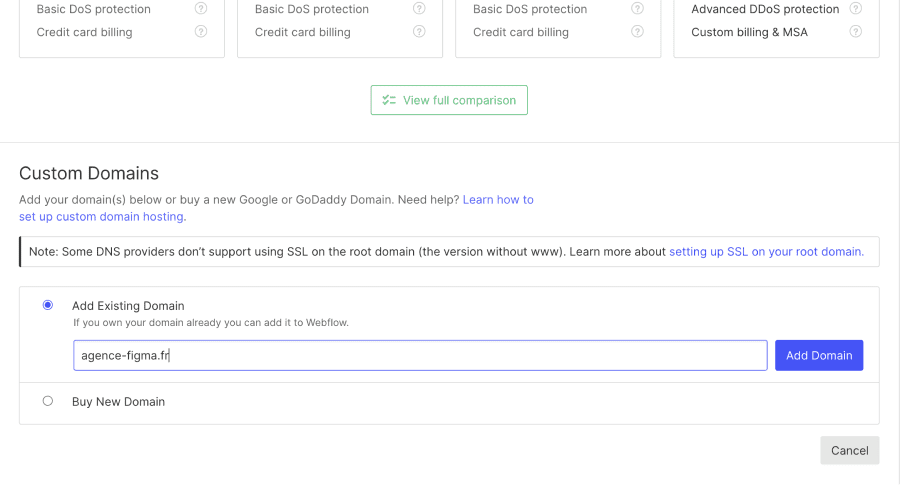
- Click on "Add a custom domain".
- Add your root domain (yourdomain.com). This will add both the root domain (yourdomain.com) and the full domain (www.yourdomain.com).


Step 4: Connect the DNS and A record fields
Go to your account (OVH, Google, CloudFlare, etc.) to configure the DNS of your Webflow site.
( ⚠️ If you already had a configuration, remember to delete the configuration of your old Wordpress site, for example)
A record
Add 2 fields of type A with the value (Host @)
- 75.2.70.75
- 99.83.190.102
DNS
Add a CNAME field (Host www)
- proxy-ssl-webflow.com

Step 5: Check and publish!
- Check
- In order to check that the registrations with your accommodation have been completed, click on "check status". If you see...
- Issue detected with an alert icon: there is a problem. Check that you have entered the fields correctly without typing errors ?
- A green notch with "connected" written on it: the server is ready. Go to the next step.
- Publish!

If the box is green... all you have to do is define your default domain name by clicking on "make default" when you hover over your domain name. Then, go and check this same domain name in your settings, under the Publish button. Then click on the "Publish to selected domain" button to make your new website live.
⚠️ Depending on your hosting provider, DNS may take a while to propagate. From 24 to 72 hours. If you use Google Domains or CloudFlare it is usually very fast (less than 15 minutes).


.jpg)


