Here is a tutorial to learn how to do 301 redirects in Webflow in order not to lose visibility and keep an optimal user experience on your website!
When a page of your website is deleted or when its slug/URL changes, it is important to make a redirection. Indeed, in the opposite case, the Internet users could arrive on a 404 error page, which is not an asset for your website.
Web redirects will allow users toland on another page of your website. Today, we are going to see how to set up 301 redirects on a Webflow site!
When to do 301 redirects?
It is necessary to do a 301 redirect in 3 specific cases:
- When you modify the slug of one of your web pages
- When you delete a page from your site
- When you change the architecture of your site (for example during a redesign or migration)
In these cases, you can do a permanent redirect from an old URL to a new URL.
Why do 301 redirects?
Permanent redirects are important for several reasons. Firstly, there are issues concerning the user experience (UX) of your website:
- Uniformity and optimisation of URLs
- Modification of the site architecture
- Updating content
- Optimising slugs
- etc.
There are also SEO issues:
- A 301 redirect allows you to keep and transfer the SEO juice (the popularity granted by Google in the context of natural referencing) from an old page to the new one
- It can help avoid duplicate content
- It can be used to redirect backlinks from one page to another (e.g. if the backlink refers to a deleted URL)
- etc.
Setting up 301 redirects in Webflow
In Webflow, it is very simple to carry out 301 (or web or permanent) redirections. First of all, it is necessary to know that with Webflow, it is possible to set up redirects manually or automatically.
Webflow's automatic 301 redirection
When you have developed and published your Webflow project, you can still modify the slug and therefore the URLs of your web pages. However, you have to be careful that the redirections from the old URLs to the new ones are done properly.
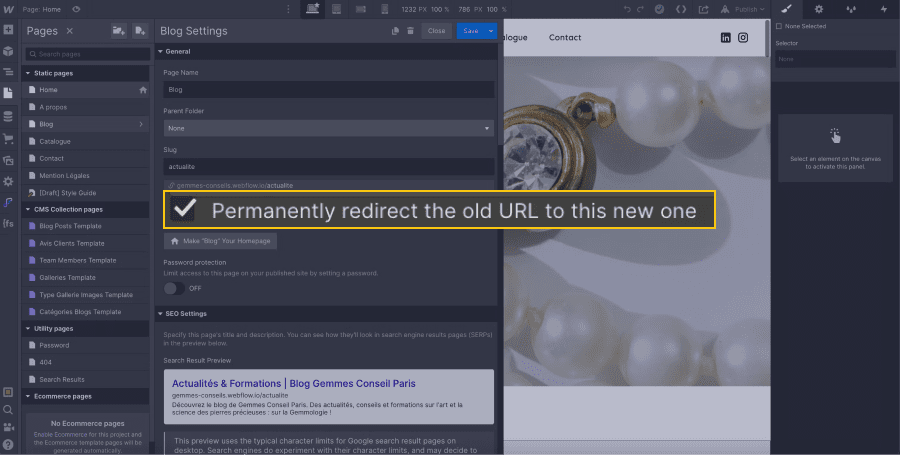
For static pages, you can access your page settings in the designer and change the slug of your page. When you change the initial slug to a new one, a small message appears below the field with a checkbox to allow you to permanently redirect the old URL to the new one. If you wish (although it is not recommended), you can uncheck the option.

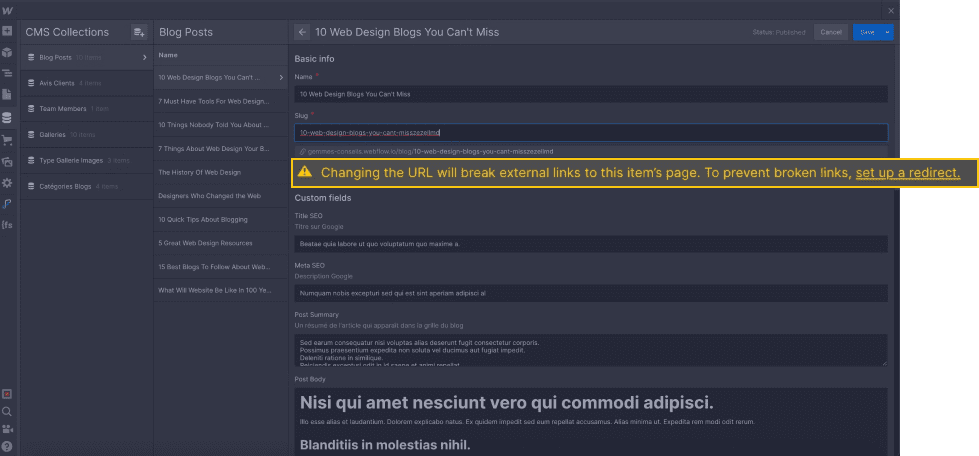
For dynamic pages (e.g. a blog post), in the CMS, when you modify the slug, you will be offered (in the designer mode) to set up a permanent redirect manually with a link to the page to do so.

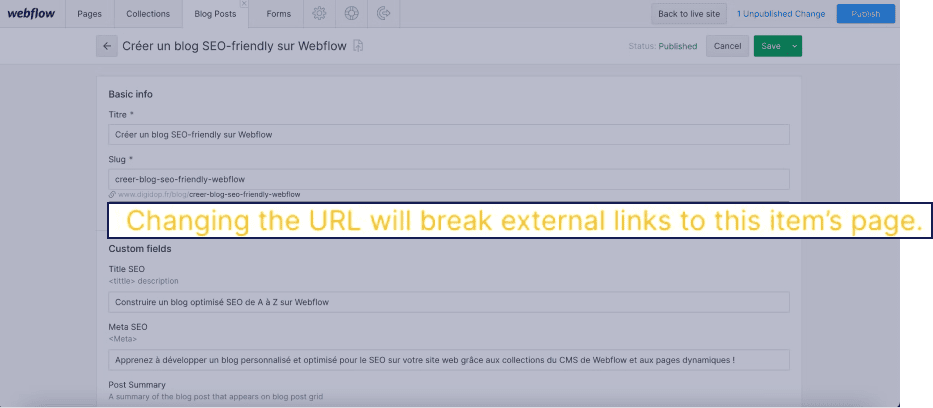
In editor mode, you will only get a prevention message (without the link). You will then have to contact the developer or access the administrator account to perform the redirection manually.

Create 301 redirects manually in Webflow
To do 301 redirects in Webflow, you just have to follow a few steps.
First, you will have to go to the general settings of your Webflow project.
Then you can go to the "Hosting" tab.
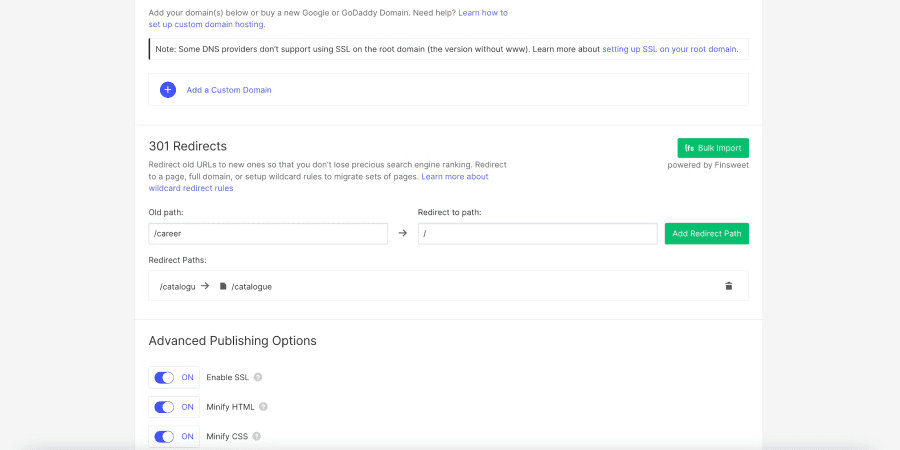
At the end of this tab, you have a "301 Redirects" section.
All you have to do is :
In "Old Path" add the old URL you want to redirect
In "Redirect to path" add the URL to which you want the old one to be redirected
Click "Add redirect path".

Some tips for 301 redirects in Webflow :
- If you are inserting an old or new URL of your site, you can simply add the slug of your page (without necessarily adding the domain name of your website). To link to the homepage, you can simply add a : /.
- It is possible to redirect a page from your website to another website or sub-domain by simply copying and pasting the URL of the destination page.
- You can import a redirection list (in csv format) through theFinsweet extension.
- It is advisable to keep your redirects permanent for at least 1 year to give the search engines time to consider, notice and verify the change.
Here is a video that will help you to perform these 301 redirects from Webflow :
You can now add 301 redirects in Webflow and keep the SEO juice of your web pages! If you need help with your Webflow project, Digidop is an expert agency to help you.


.jpg)


