Optimize the conversion rate of your web pages and improve the user experience with Google Optimize A/B tests.
How to improve the conversion rate of a landing page? This question is sometimes difficult to answer... You have respected the best practices in terms of conversion, for example by integrating all the essential sections that a landing page should contain, and yet your conversion rate remains low.
The good news is that sometimes it doesn't matter, and all you have to do is test to get the answer! In this blog post, we explain how to set up A/B testing on your website, using Google Optimize.
1. Choose the element you want to test
Start by identifying one or more strategic elements of your page that can be improved. It could be the catchphrase of your header, the look of a button, the message it contains, the integration of a pop-up or the modification of a whole section. The idea is to create variations of an element of your page, and then test them and analyze which one will be the most effective.
2. Start with a hypothesis
An A/B test should never be done randomly, otherwise you would spend your time testing each element of your site without really knowing what and how to analyze it. For this, it is essential to start from a precise problem that you have encountered on your site. For example, a very high bounce rate on one page rather than another, a very low conversion rate despite the high traffic of a page, demographic data that has suddenly changed following the modification of a page, etc.
To help you identify these problems, many analysis tools exist, such as Google Analytics, Semrush, Google Search Console, or Nocodelytics for Webflow. Once you have identified the problem, we recommend that you brainstorm in teams to identify several hypotheses. Hypotheses are probable solutions that will ultimately solve the problem. Decide on the most coherent / probable hypothesis according to the team and then move on to the A/B testing phase.
Hypothesis example: change the text of the "Learn more" button to "Contact our team" to improve the conversion rate.
3. Create an A/B test on Google Optimize

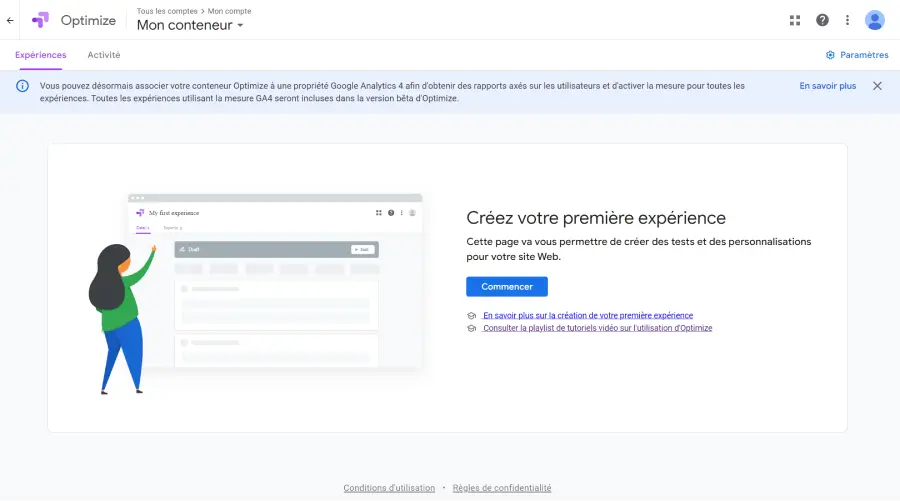
Google Optimize is a free tool, which allows you to test several versions of your web pages. Optimize integrates directly with your Google Analytics, Google Ads or Firebase tools. To create your first A/B testing you will need to :
- Create a Google Optimize account
- Choosing a meter
- Create a first test by clicking on Start
- Give your test a name
- Include the URL of the publishing page you want to test. Be careful, it can't be a redirection URL.
- Choose the A/B* Test
*Google Optimize offers different types of tests. To learn more, read our Google Optimize tool sheet.
4. Add and set up variants
4.1 Add a variant
In this step you can start adding variants of the page you want to test. You can add as many variants as you want and then draw conclusions.
- Click on Add a variant
- Give your variant a name and click OK.
- Each new variant you create, displays "Modifications (0)". Click on Modify, to start customizing your web page variants.
- Install theGoogle Optimize extension, then click Edit again on the variant you want to test. You will then be redirected to the URL of the page you want to test, from Google Optimize.

4.2 Setting up variants
To make your first changes on Google Optimize:
- Select the element of your page you want to test. For example a button.
- Make your various modifications from the editing panel located at the bottom right of your screen. For example, you can change the text, the position, the color, the lines, the layout, the fact that the element is visible or not, etc.
- Click on Save.
- Click on OK.
4.3 How are the variants weighted?
By default, Google Optimize distributes the visibility of your variants equally. They will all have the same chance to be seen by your visitors. However, you can customize this distribution from the detailed page of your test.
5. Set up the test objectives
Google Optimize allows you to go further in the configuration of your A/B tests by specifying your target, the objective of the test, or the visitor traffic to test.
5.1 Refine targeting
From the Targeted Audience section, Optimize offers you many rules to integrate to refine the test with a certain type of user. For example, you can:
- Test visitors according to specific UTM parameters
- Target according to the type of support: phone, tablet, computer
- Test according to the type of user: new or not
- Targeting according to user behavior: from such and such a page type
- Refine by geographic area
- Target by URL query
- Test according to cookies
- Targeting according to a JavaScipt variable in the source code of the page, or a custom variable
- etc.
5.2 Adding an Objective to the test
From the Measures and Objectives section, you can:
- Connect Google Analytics
- Specify the objective of your test
5.3 Refining the test traffic
From the Traffic Distribution section, Google Optimize allows you to select the percentage of visitors to which this test will be presented. You can test 100% of your users or less.
5.4 When to test your users?
From the Activation event section, you can specify the type of event that triggers the test:
- When the page loads
- Indefinitely
- During a personalized event
Once you have created all your variables and customized your parameters, you just have to click on Start to launch your A/B Test.


.png)

.jpg)

.jpg)


