Here are all the steps to automate your Webflow site with Integromat. Let's connect a webhook to Webflow.
How to connect and automate your Webflow website with Integromat?
The advantage with nocode tools is that you can interconnect them. Most of these tools offer integrations that allow you to manage your workspace more easily. Let's take a look at the different possibilities of Webflow integration with Integromat.
Why connect Webflow with Integromat?
Webflow is our preferred web design tool. Our site and those of our clients are developed with Webflow. As with any website, it is important to link it directly to your company and your teams. There are hundreds of nocode tools, and more. Although Webflow is a great tool, it does not have all the integrations on the market.
This is where Integromat comes in! This nocode and lowcode automation tool has hundreds of integrations that allow you to create simple to complex chains. Simply receiving leads from your website or going further by creating a chain of actions is easily done with Integromat. There are no limits to the creation and customisation of workflows:
- Monitor, add or delete events
- Manage your CMS
- Receive your leads in your CRM and notify your teams
- Create, publish, edit articles
- Publish your site
- etc.
What are the conditions to associate your Webflow site with your Integromat automations?
Nothing very complicated, you just need to have a paying Webflow account and of course an Integromat account. A few notions in nocode and you can start automating!
- Create a Webflow account
- Create an Integromat account
How to connect Webflow and Integromat?
Thanks to nocode and all those integrations that make life easier. Here are the steps to connect your Webflow site with your Integromat automations. In this example, we will focus on the module with webhook trigger.
Step 1: Create a new scenario
Log in to your Integromat account and create a new scenario from your dashboard.

Step 2: Search for the Webflow module
Integromat has a Webflow module, i.e. a direct integration of the Webflow tool. These integrations offer a multiple choice of actions to be performed according to specific triggers. Forget about JSON, no line of code is required with these modules.
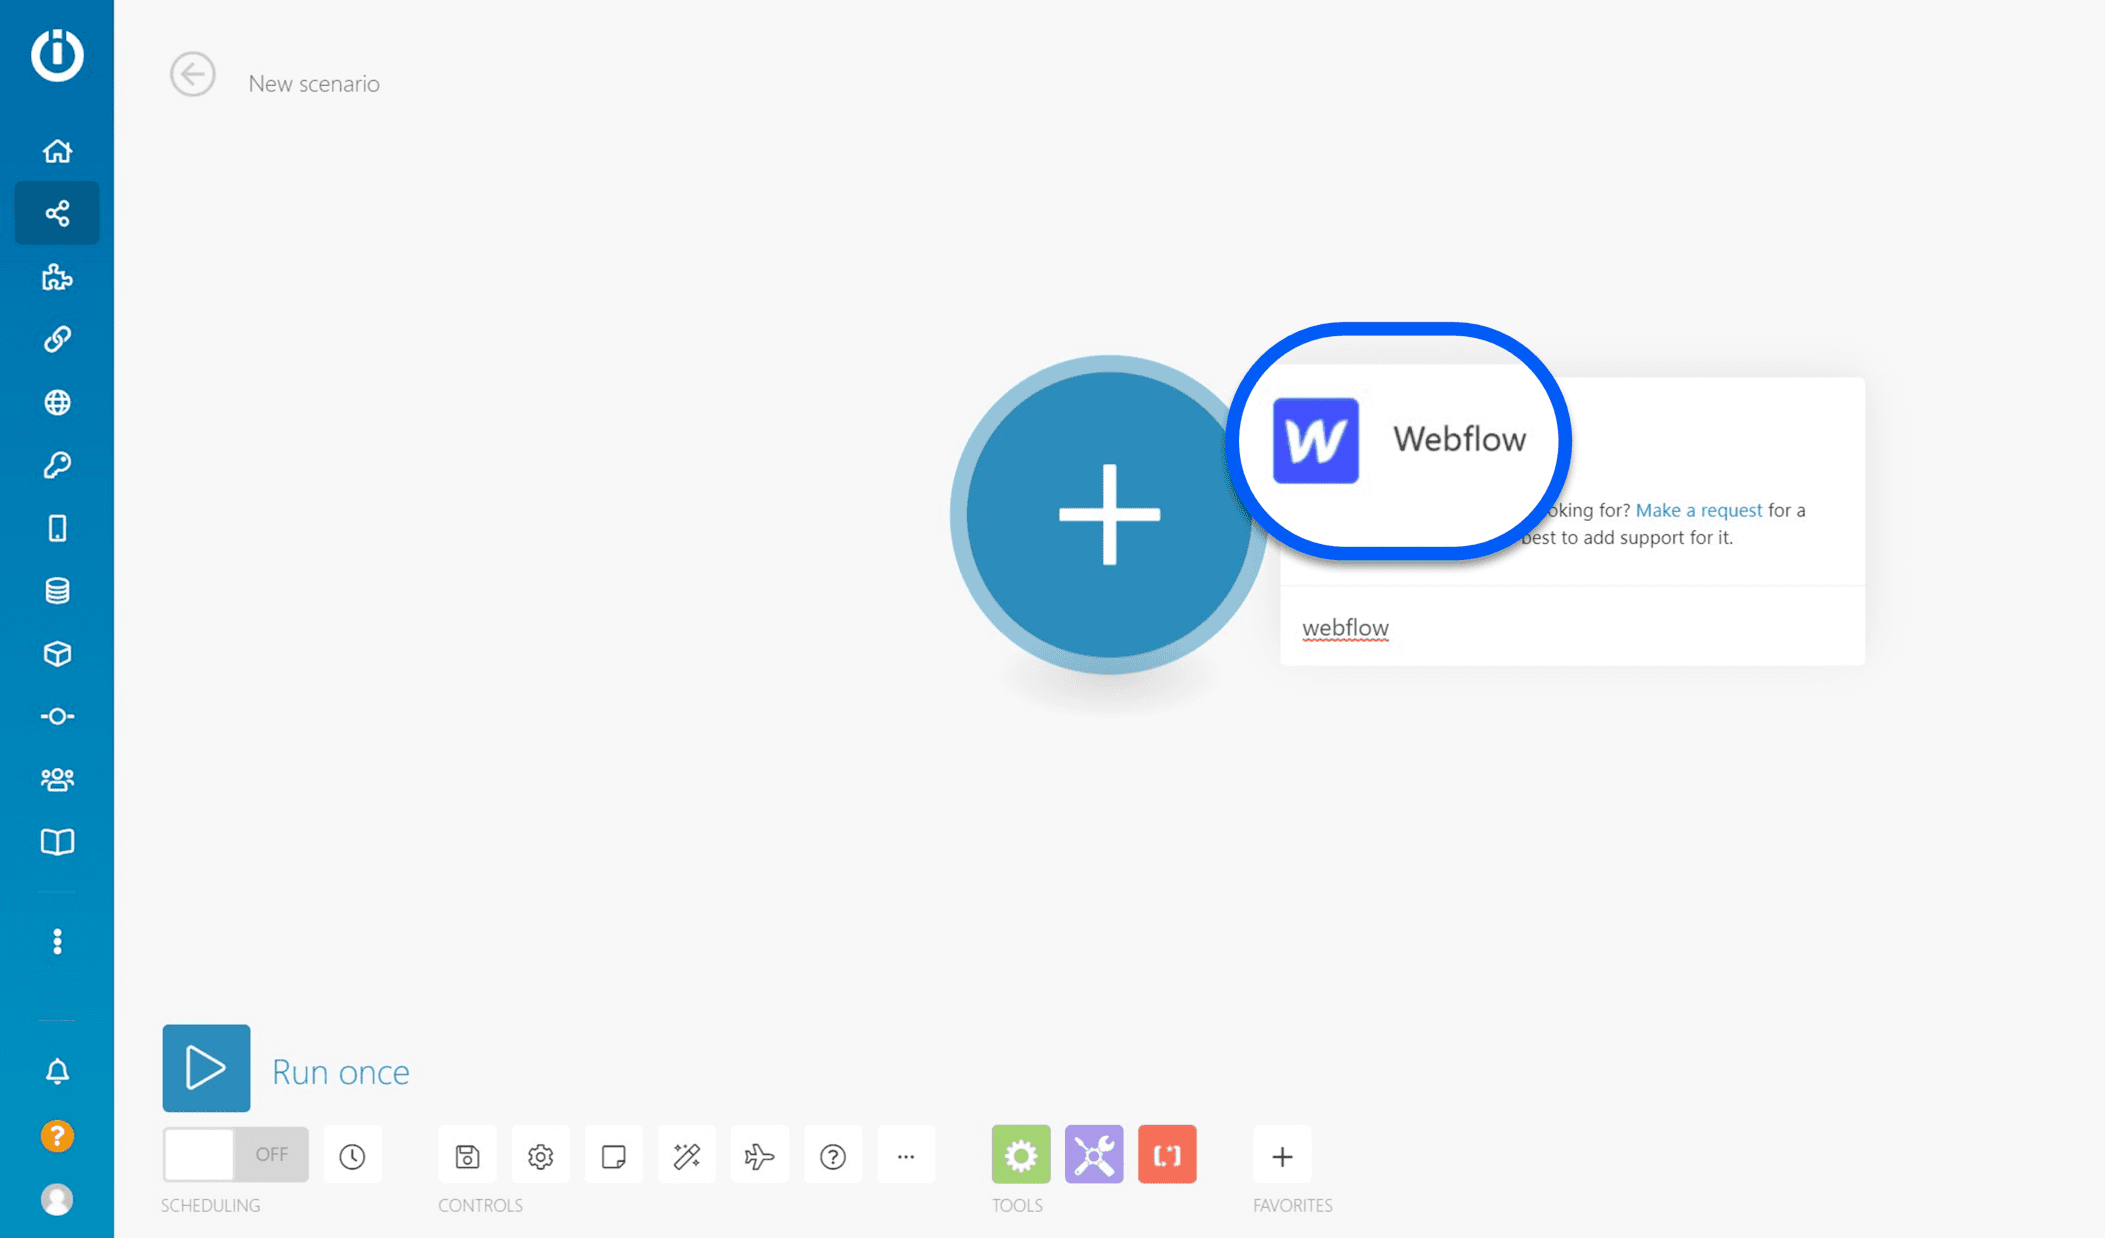
Step 3: Select a trigger
An automation starts from a "Trigger", i.e. an event that will trigger a series of other events. The Webflow module proposes a certain number of triggers, it is up to you to choose the one that suits you.
Triggers can be "instant" as is the case with the one we choose in this example: "Watch Events". Instant triggers are triggered instantly at the moment of the action. For example, when a new contact form is received.
Other triggers will act as robots that inspect your site at regular intervals: every hour, every day, every week, etc. It is up to you to define the most suitable timeframe for your company's needs.

Webhook
Trigger that acts when an event occurs. The Webflow module offers webhook events such as: new form, publication of the site, new order on your e-commerce site, inventory change, etc.
Website
Use it to extract data from your website, to publish an existing website or to get a complete list of your projects.
Collection
Mainly dedicated to e-commerce sites, this trigger allows you to obtain information on your different collections or categories of items.
Item
For the creation, modification and deletion of Webflow e-commerce site articles.
Order
Based on the orders on your site, you will be able to: find customer orders, unfinished or refunded purchases, etc.
Inventory
A trigger that allows you to monitor the inventory of specific products.
Other
Opens the field of possibilities by triggering APIs.
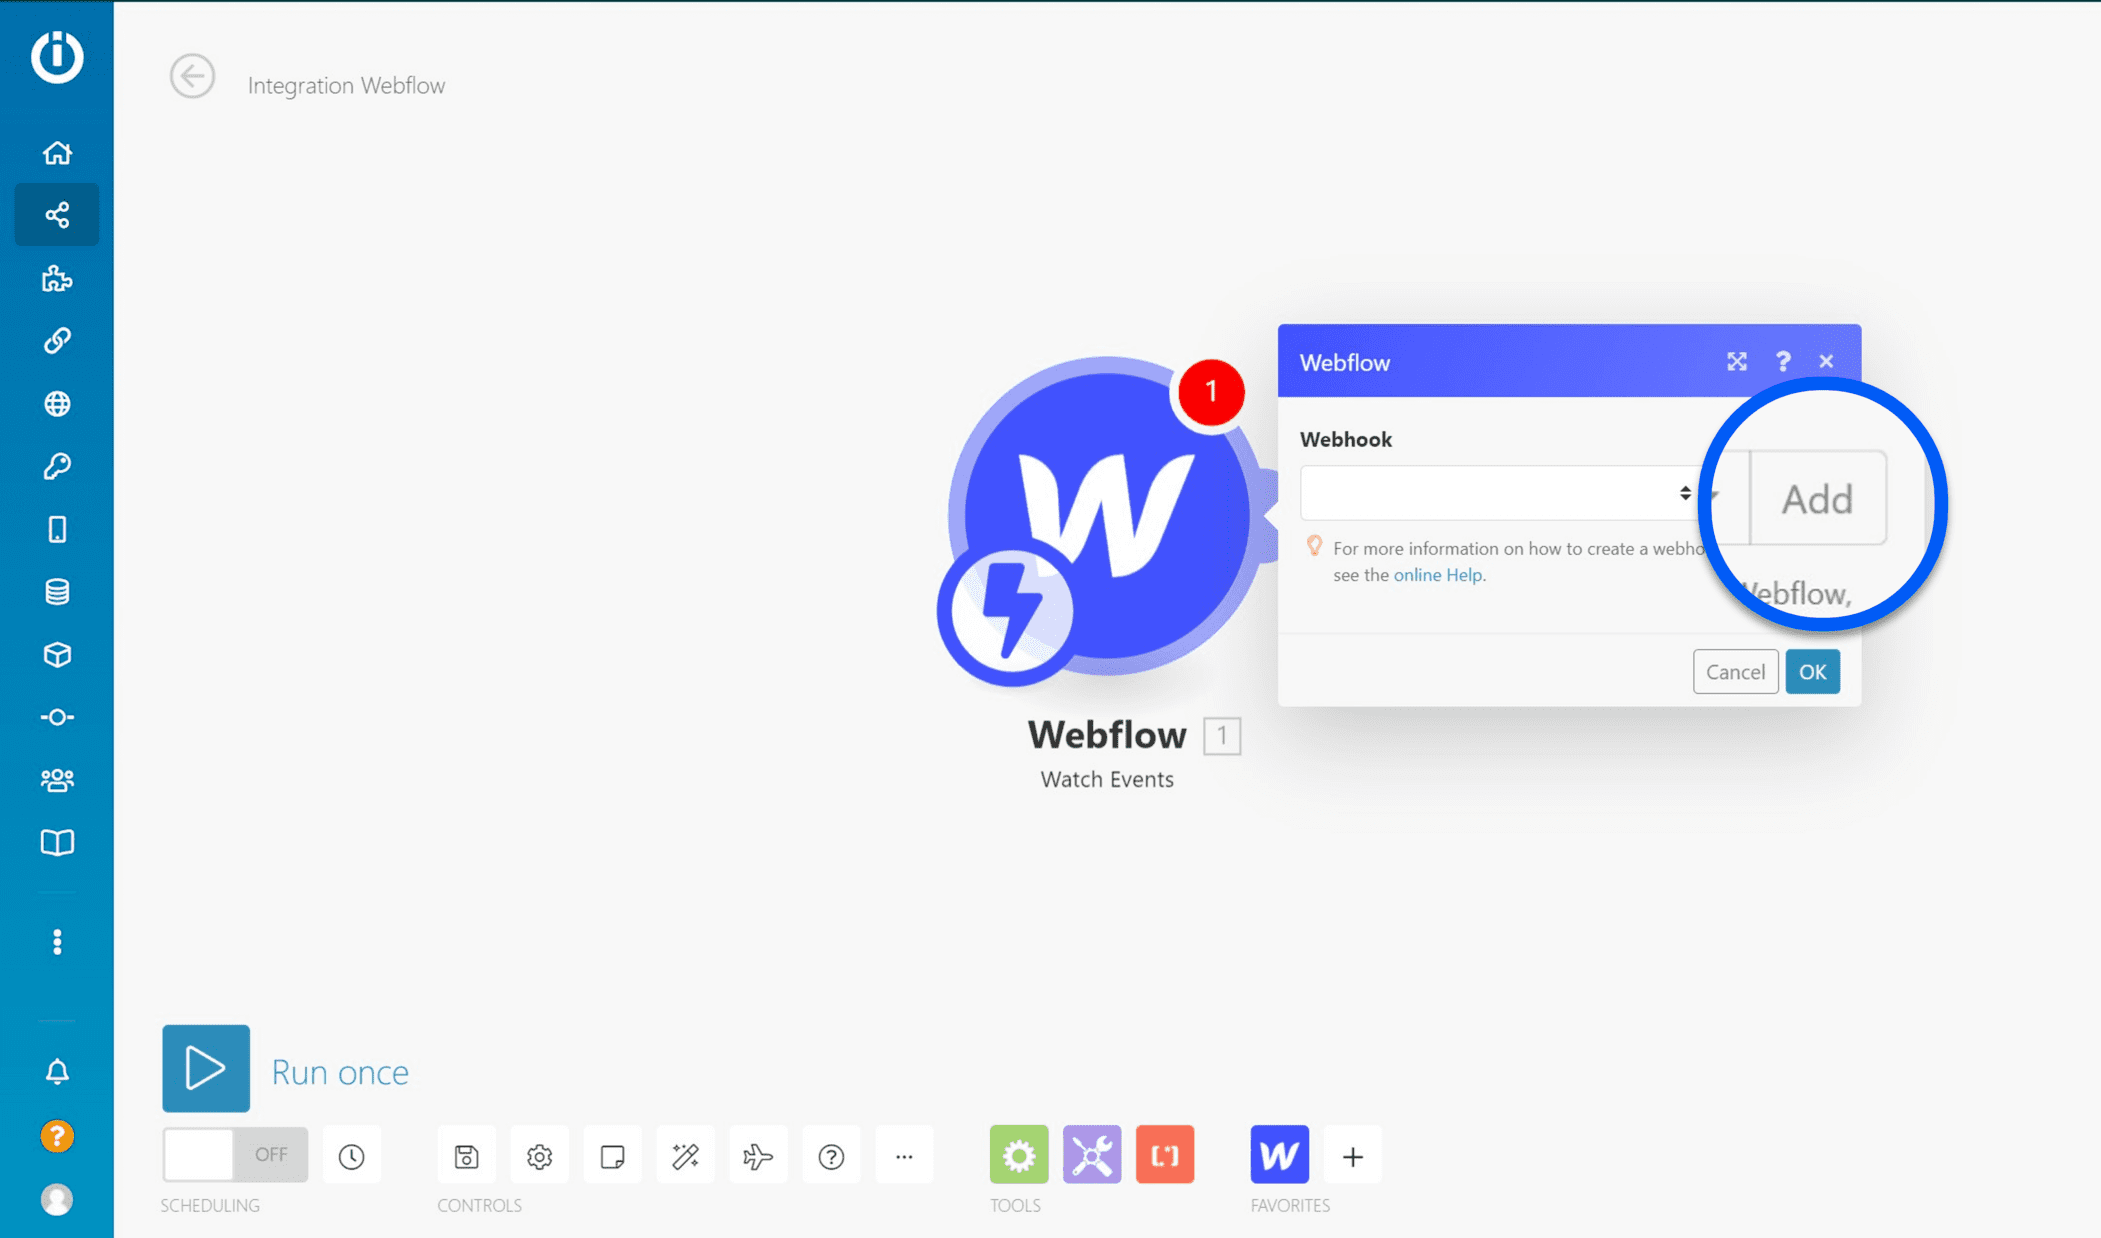
Step 4: Add a webhook
Once you have selected your trigger, it is time to add a webhook, i.e. create a trigger that will target a specific action for a specific site. Press "add" to add a new webhook, then click "ok".
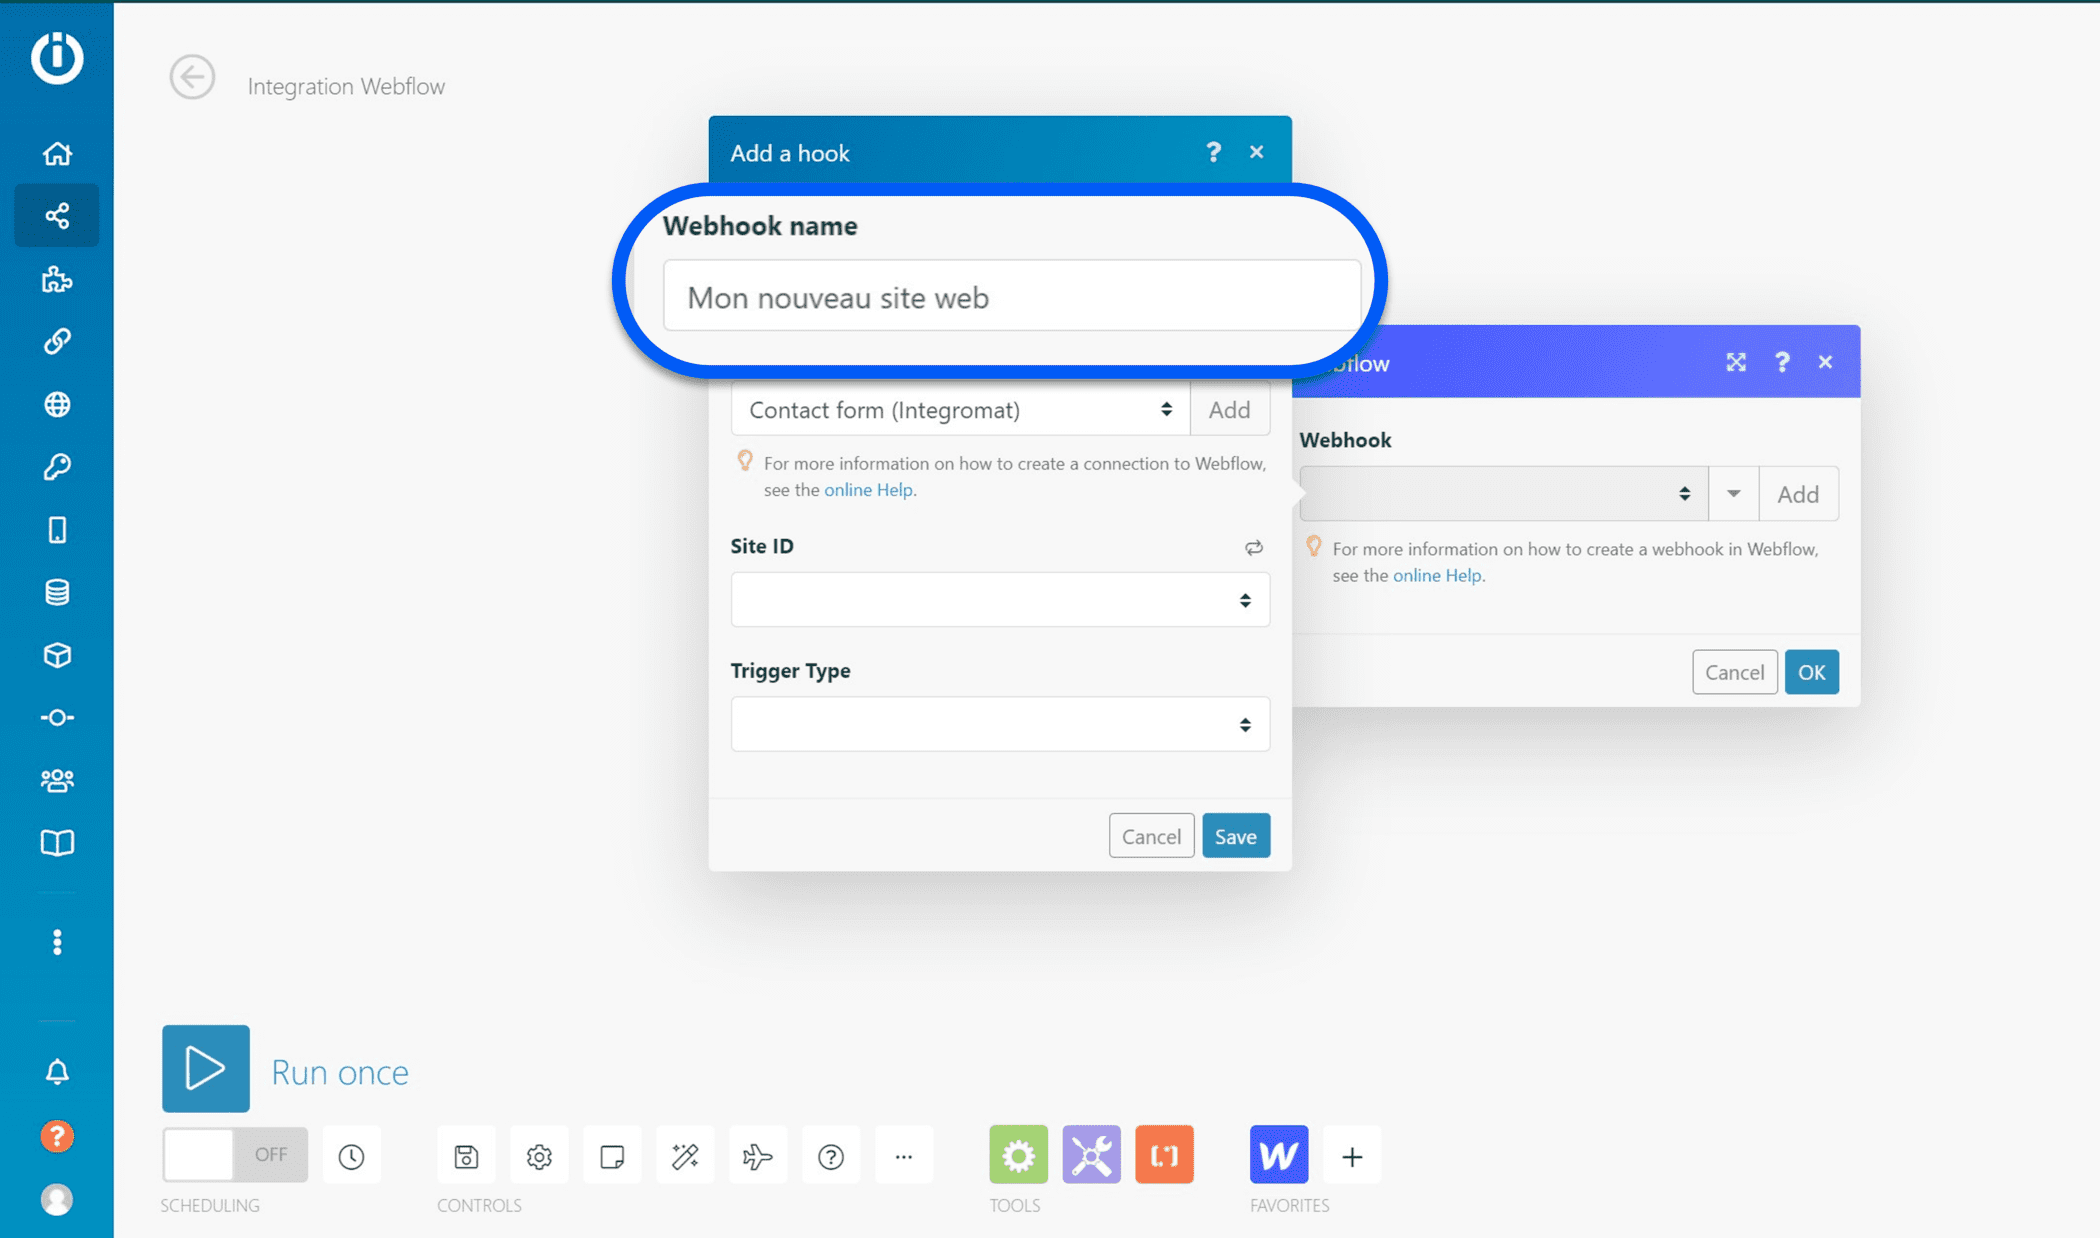
Step 5: Rename your Webhook
Sometimes a company has several sites. For example to give access to a different type of content: company site / media site / pro site / etc. It is important to name your webhook correctly because you can have several depending on the sites you connect. We therefore advise you to rename your webhook by the name of the website in question.
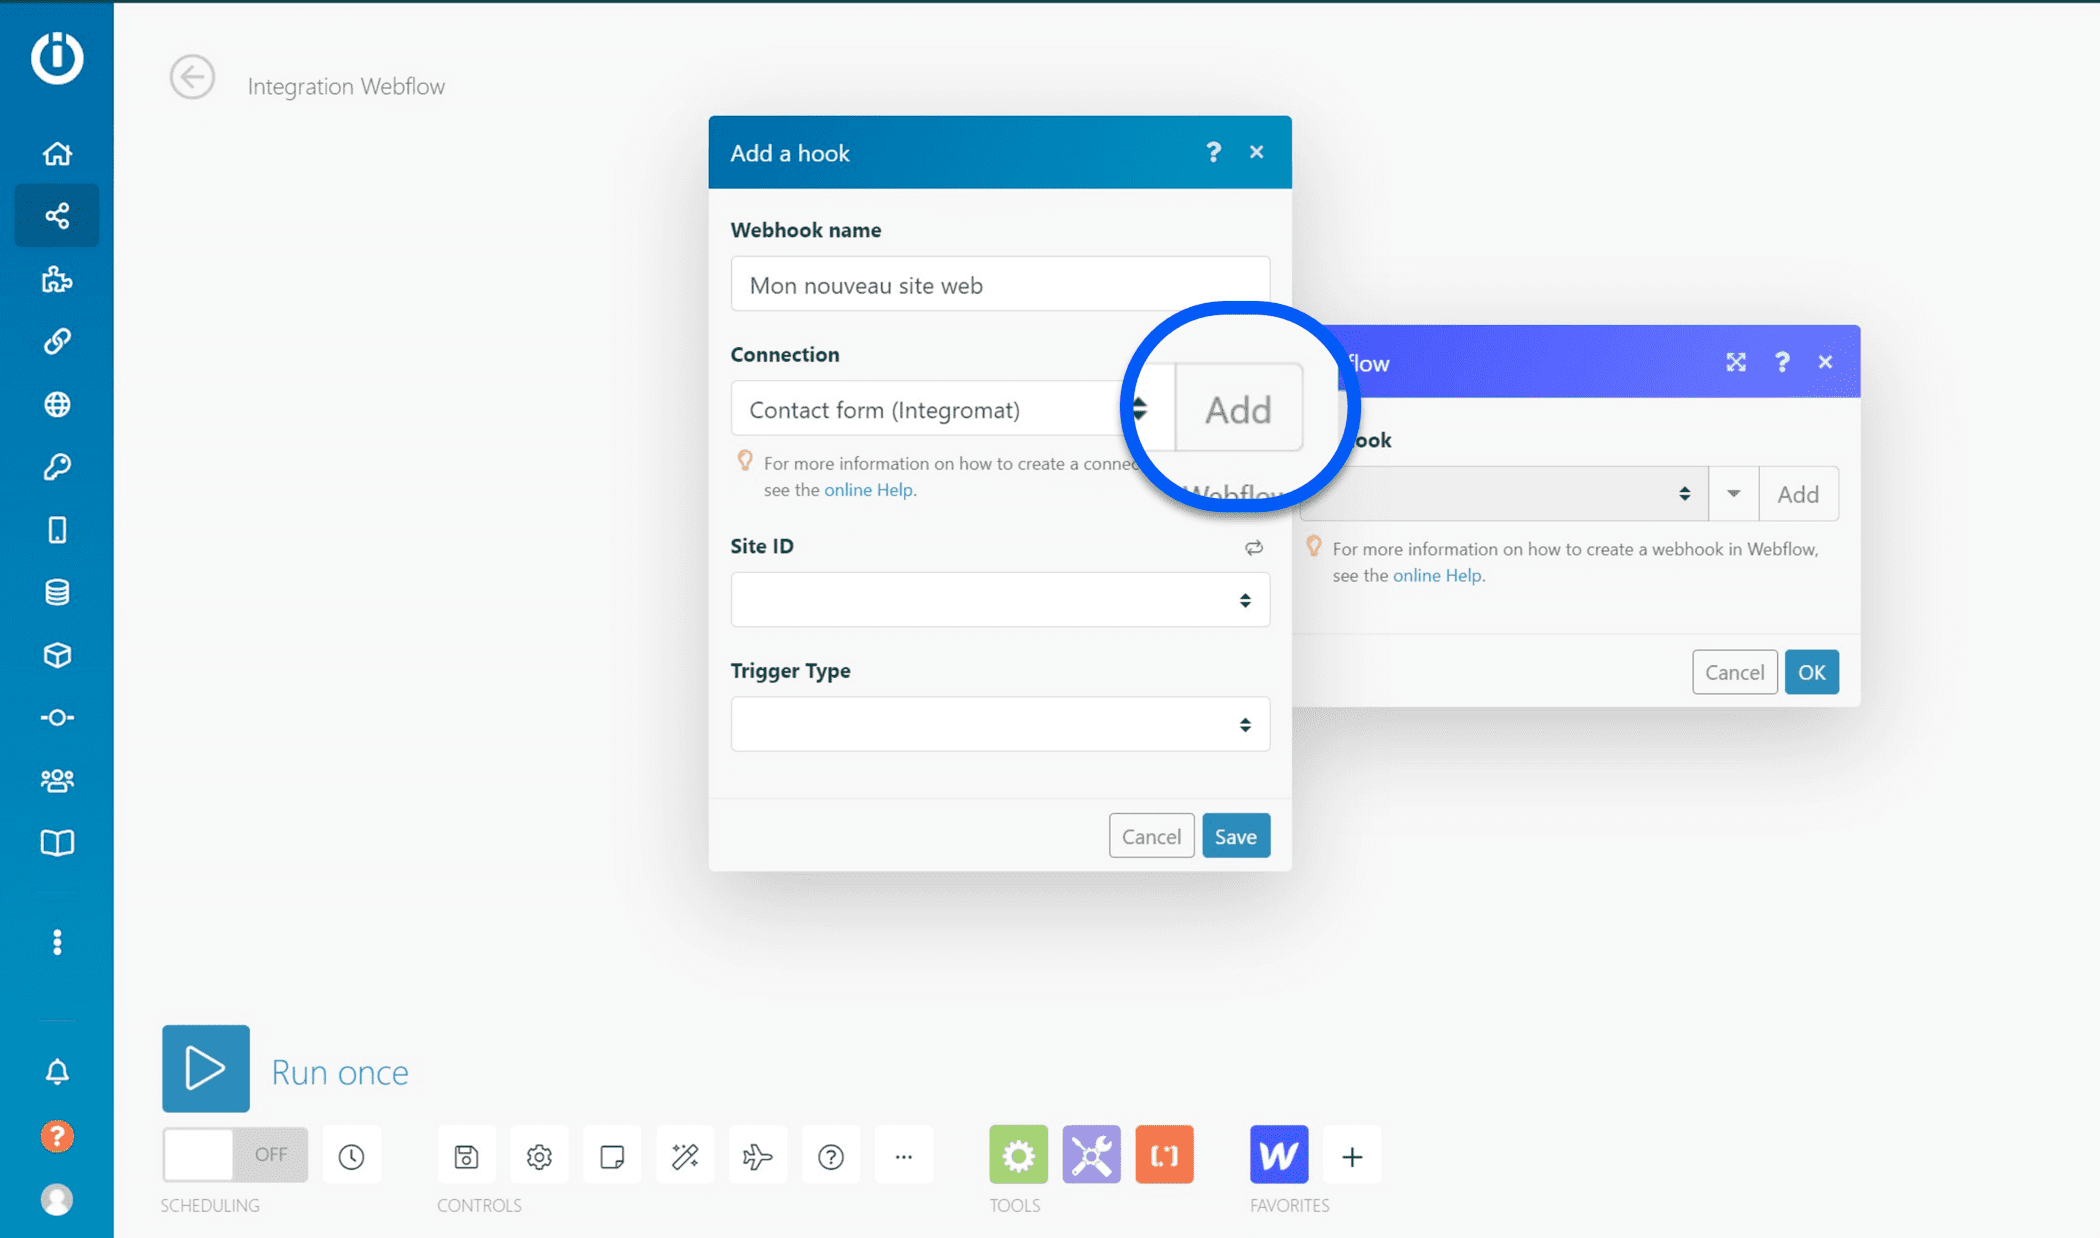
Step 6: Add a new connection
It is time to add a new Webflow connection to your Integromat account. To do so, click on "add" in the "Connection" tab.
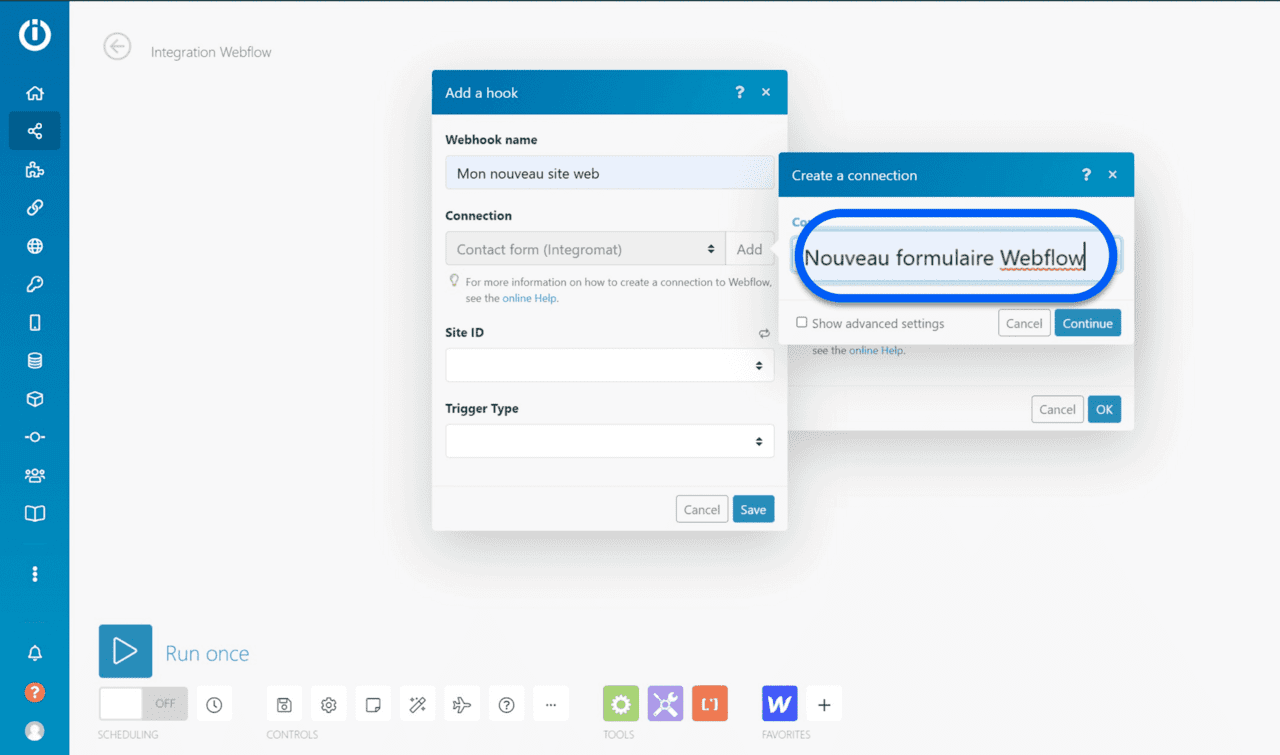
Step 7: Rename your connection
It is possible that you have several Webflow accounts within your teams. Just like for the webhook, it is important to rename your connection by indicating to whom it belongs. Here our automation will be connected to our contact form. Once renamed, click on "Continue".
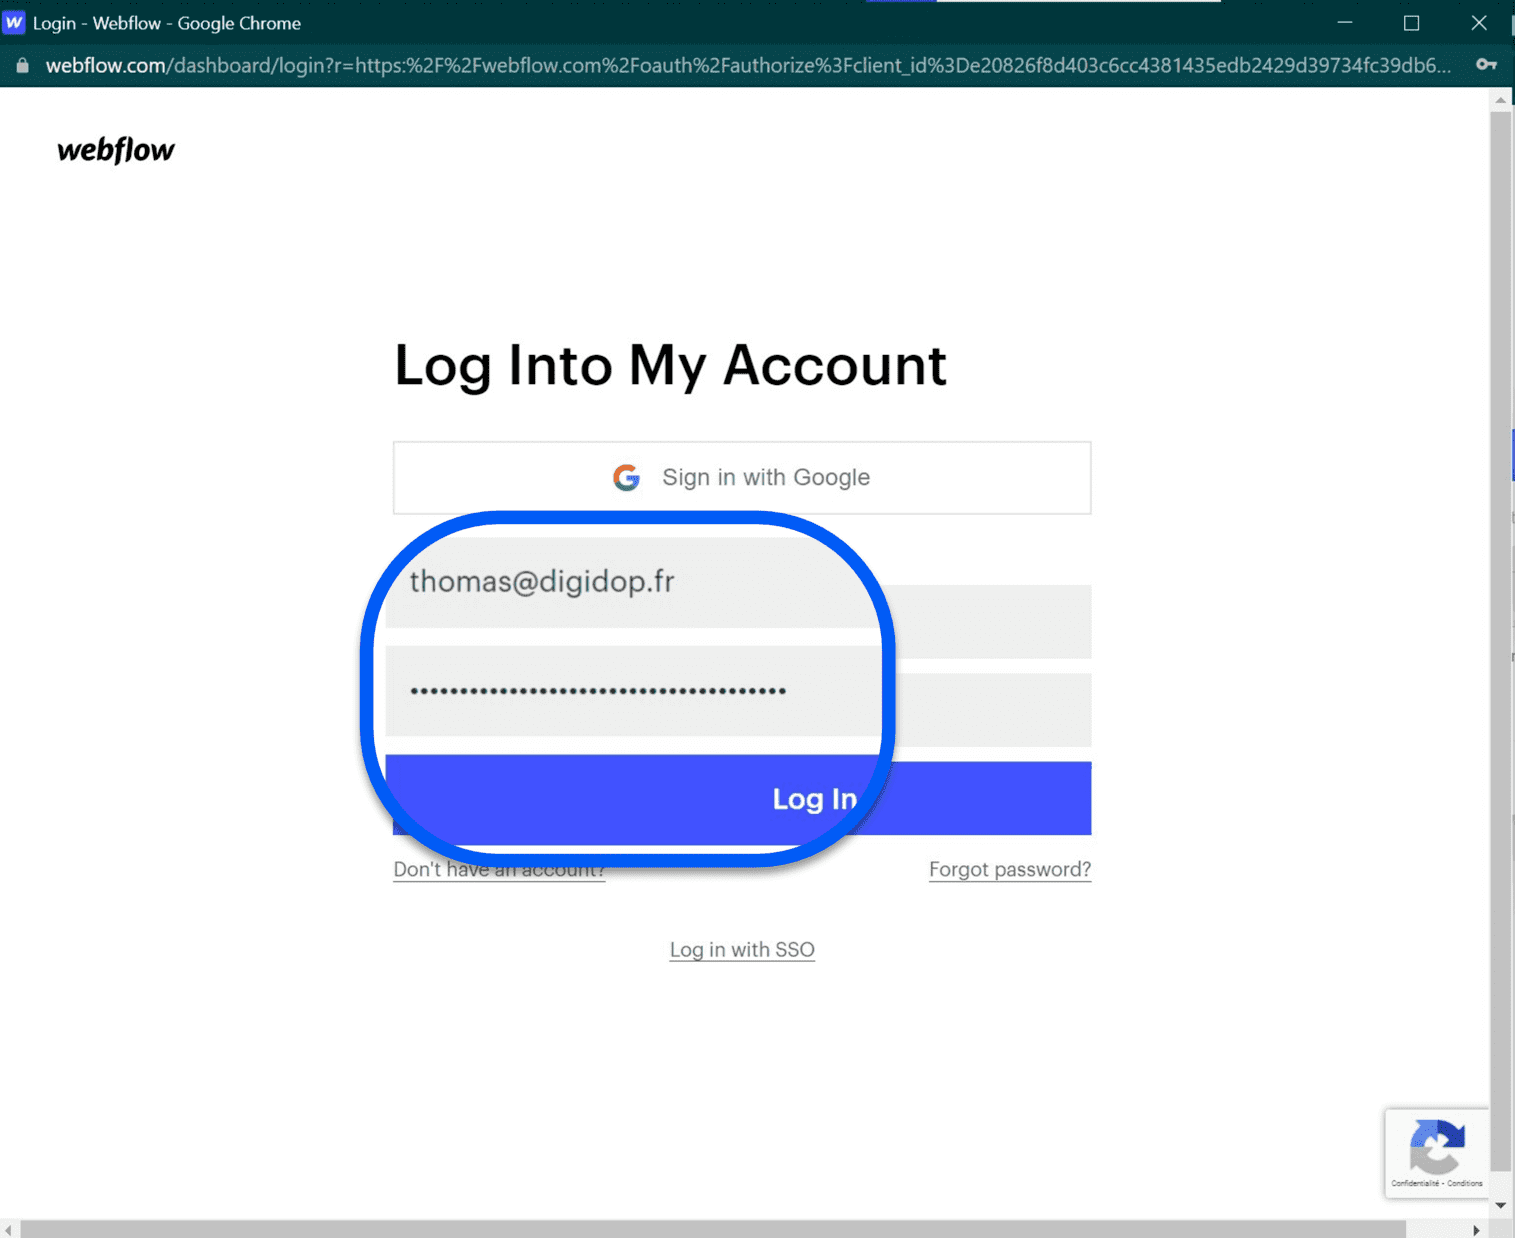
Step 8: Connect to Webflow
A pop-up window opens from your Integromat interface. This is a quick authentication system to Webflow. Enter your credentials without fear, this will automatically connect you to Webflow. Then click on "Log In".
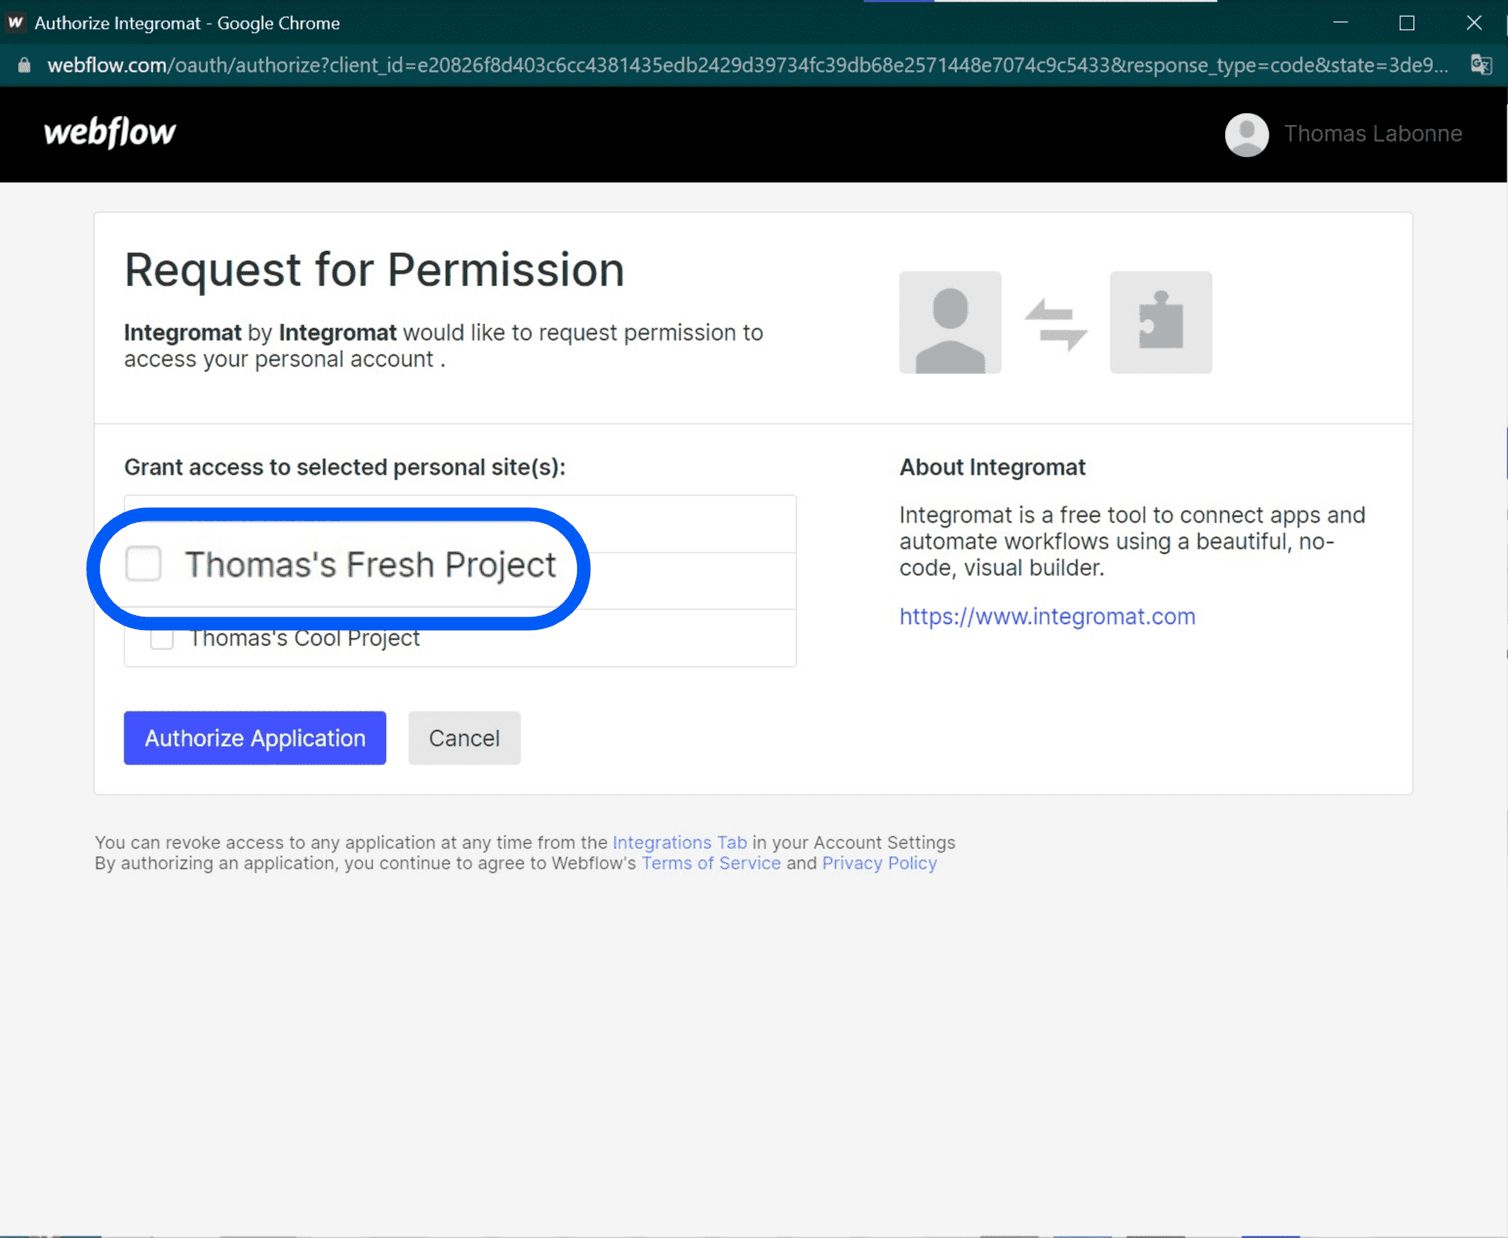
Step 9: Give access permissions
In Webflow a project refers to a website. Select the project you want to automate here. This will give Integromat the right to enter your site to perform any type of action. It is possible to select multiple projects to give Integromat access permissions.
Step 10: Choose your project
From the list of projects/sites to which Integromat now has access, select the one you wish to automate.
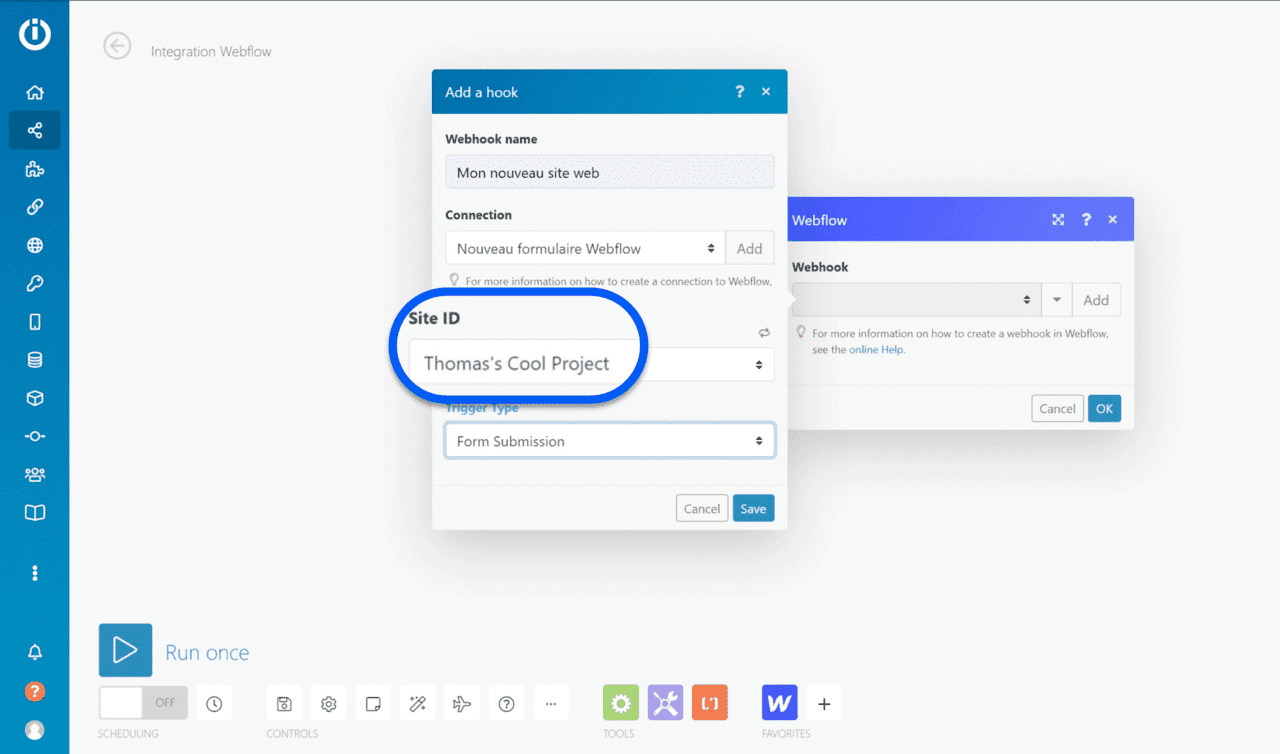
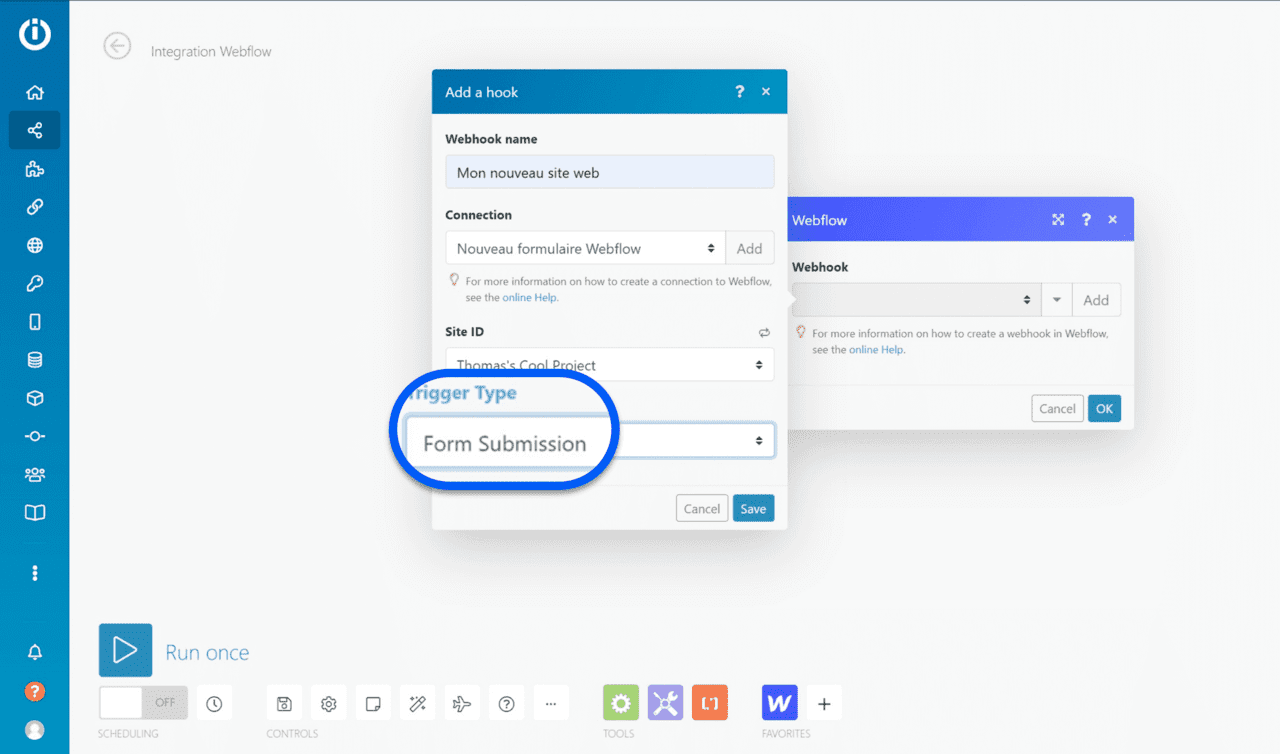
Step 11: Select the trigger type
The last step is to select the trigger that meets your needs from the drop-down list: contact form, website publication, new e-commerce inventory, etc.
Now that you have connected your Webflow account to Integromat all you have to do is automate! 🤖 For example, you can add modules to connect slack to Webflow and keep your teams informed in real time of site movements. Or connect Webflow to Airtable to automatically send and sort your website data.


.jpg)


